
KVM (for Kernel-based Virtual Machine) is a full virtualization solution for Linux on x86 hardware containing virtualization extensions (Intel VT or AMD-V). It consists of a loadable kernel module, kvm.ko, that provides the core virtualization infrastructure and a processor specific module, kvm-intel.ko or kvm-amd.ko. KVM also requires a modified QEMU although work is underway to get the required changes upstream.
Using KVM, one can run multiple virtual machines running unmodified Linux or Windows images. Each virtual machine has private virtualized hardware: a network card, disk, graphics adapter, etc.
Official Website www.linux-kvm.org
Environment
Host Operating System                          : Microsoft Windows 8.1 Professional With Media Center 64-bit
VMware Virtual Machine Guest Operating System  : Ubuntu Server 12.04.2 LTS 64-bit
KVM Guest Operating System                     : CentOS 6.4 64-bit
1. Install Ubuntu Server
In VMware Virtual Machine environment, install Ubuntu Server 12.04, the installation process is very simple, I will not detail here, and I chose the virtual network NAT mode. In the Virtual Machine Settings dialog box, enable the Virtualization engine options( Virtualize Intel VT-x/EPT or AMD-v/RVI and Virtualize CPU performance counters).
Use the following command to check whether the cpu support virtualization
$ sudo egrep '(vmx|svm)' --color=always /proc/cpuinfo
flags           : fpu vme de pse tsc msr pae mce cx8 apic sep mtrr pge mca cmov pat pse36 clflush dts mmx fxsr sse sse2 ss syscall nx rdtscp lm constant_tsc up arch_perfmon pebs bts nopl xtopology tsc_reliable nonstop_tsc aperfmperf pni pclmulqdq vmx ssse3 cx16 pcid sse4_1 sse4_2 x2apic popcnt aes xsave avx f16c rdrand hypervisor lahf_lm ida arat epb xsaveopt pln pts dtherm tpr_shadow vnmi ept vpid fsgsbase smep
If nothing is displayed, it indicates that the CPU does not support virtualization, experiments can't continue.
2. Install KVM
Now install kvm and kvm builder script. This script is used to create a virtual machine based on Ubuntu.
$ sudo apt-get install ubuntu-virt-server python-vm-builder kvm-ipxe virtinst libcap2-bin
3. Add the current user to the kvm and libvirtd group
$ sudo adduser `id -un` libvirtd
$ sudo adduser `id -un` kvm
Logout and login again. Run the following command to check whether installation kvm successfully
$ sudo virsh -c qemu:///system list
 Id Name                 State
----------------------------------
3. Setting Network
The following settings network to ensure network access to other hosts kvm manage virtual machines.
May need to install bridge-utils, my test machine when installing the operating system already has. If you have not installed, run the following command
$ sudo apt-get install bridge-utils
Edit /etc/network/interface file like this, modify ...
# This file describes the network interfaces available on your system
# and how to activate them. For more information, see interfaces(5).

# The loopback network interface
auto lo
iface lo inet loopback

# The primary network interface
auto eth0
iface eth0 inet dhcp
... to ...
# This file describes the network interfaces available on your system
# and how to activate them. For more information, see interfaces(5).

# The loopback network interface
auto lo
iface lo inet loopback

# The primary network interface (disable)
#auto eth0
#iface eth0 inet dhcp

# The primary network interface for kvm
auto eth0
iface eth0 inet manual

auto br0
iface br0 inet static
    address 192.168.40.134
    network 192.168.40.0
    netmask 255.255.255.0
    broadcast 192.168.40.255
    gateway 192.168.40.1
    dns-nameservers 8.8.8.8 8.8.4.4
    bridge_ports eth0
    bridge_fd 9
    bridge_hello 2
    bridge_maxage 12
    bridge_stp off
Restart network
$ sudo /etc/init.d/networking restart
Then check the network configuration
$ ifconfig
br0       Link encap:Ethernet  HWaddr 00:0c:29:ba:a9:0a
          inet addr:192.168.40.134  Bcast:192.168.40.255  Mask:255.255.255.0
          inet6 addr: fe80::20c:29ff:feba:a90a/64 Scope:Link
          UP BROADCAST RUNNING MULTICAST  MTU:1500  Metric:1
          RX packets:85 errors:0 dropped:0 overruns:0 frame:0
          TX packets:90 errors:0 dropped:0 overruns:0 carrier:0
          collisions:0 txqueuelen:0
          RX bytes:7122 (7.1 KB)  TX bytes:15530 (15.5 KB)

eth0      Link encap:Ethernet  HWaddr 00:0c:29:ba:a9:0a
          UP BROADCAST RUNNING MULTICAST  MTU:1500  Metric:1
          RX packets:1530 errors:0 dropped:0 overruns:0 frame:0
          TX packets:1134 errors:0 dropped:0 overruns:0 carrier:0
          collisions:0 txqueuelen:1000
          RX bytes:146559 (146.5 KB)  TX bytes:227280 (227.2 KB)

lo        Link encap:Local Loopback
          inet addr:127.0.0.1  Mask:255.0.0.0
          inet6 addr: ::1/128 Scope:Host
          UP LOOPBACK RUNNING  MTU:16436  Metric:1
          RX packets:40 errors:0 dropped:0 overruns:0 frame:0
          TX packets:40 errors:0 dropped:0 overruns:0 carrier:0
          collisions:0 txqueuelen:0
          RX bytes:3280 (3.2 KB)  TX bytes:3280 (3.2 KB)

virbr0    Link encap:Ethernet  HWaddr 16:5d:91:f5:d2:71
          inet addr:192.168.122.1  Bcast:192.168.122.255  Mask:255.255.255.0
          UP BROADCAST MULTICAST  MTU:1500  Metric:1
          RX packets:0 errors:0 dropped:0 overruns:0 frame:0
          TX packets:0 errors:0 dropped:0 overruns:0 carrier:0
          collisions:0 txqueuelen:0
          RX bytes:0 (0.0 B)  TX bytes:0 (0.0 B)
Restart the computer
$ sudo reboot
4. Fix Some Bug
Completed, there will be some bugs:
User login host via ssh after a while you can not connect, and then ssh can not log in until restart the host machine's network services.
Solutions, run the following command, after executed this command, it will automatically add the missing route rules
$ sudo dhclient br0 &
5. Configuring qemu-kvm
$ sudo setcap cap_net_admin=ei /usr/bin/qemu-system-x86_64
Configuring qemu-kvm inheritance CAP_NET_ADMIN capability by edit capability.conf file
$ sudo vi /etc/security/capability.conf
Add the following line
cap_net_admin username
Open /etc/libvirt/qemu.conffile, check vnc_listen="0.0.0.0"is enabled, if not enabled, uncomment it.
6. Install Guest OS
Before Create a virtual machine, you need to create a disk image as a virtual machine's hard disk, using the following commands, generation a 60GB centos.img, format is qcow2.
$ sudo qemu-img create -f qcow2 /opt/centos.img 60
Using virt-install command to create a virtual machine
virt-install --name centos-server1 --ram 512 --vcpus=1 --check-cpu --os-type=linux -c /home/xuri/CentOS-6.4-x86_64-LiveCD.iso --disk path=/opt/centos.img,device=disk,bus=ide,format=qcow2 --bridge=br0 --vnc --vncport=5901 --vnclisten=0.0.0.0
Note
-c    Location of system installation iso file
--disk path=    Created the position of disk mirroring
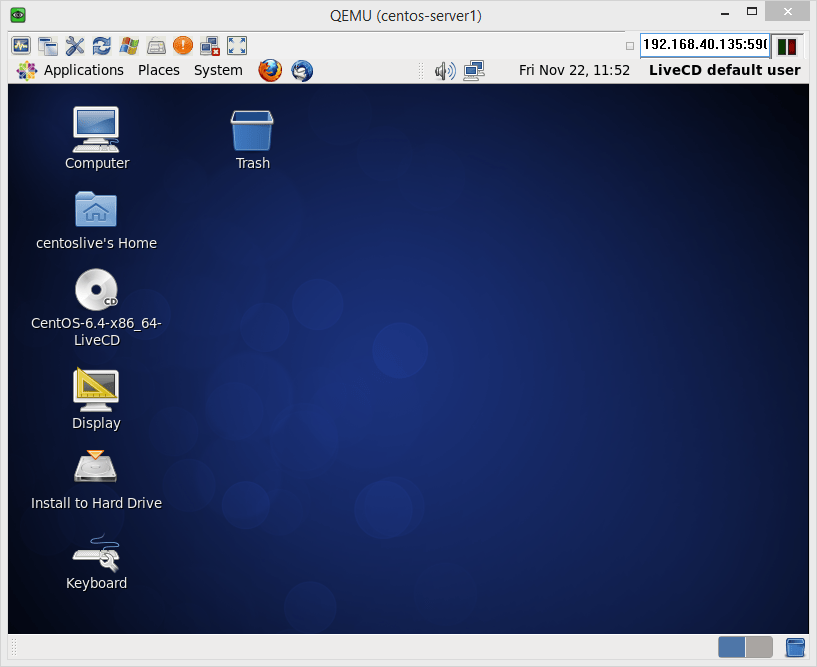
7. Connect to the Virtual Machine
After the above step, the virtual machine has actually started, and enter the system installation interface,
Install UltraVNC Viewer 1.0.9.6 on client to connect to the virtual machine for subsequent installation.
8. Management the Virtual Machine
View the Virtual Machine
$ sudo virsh --connect qemu:///system
virsh # list --all
 Id Name                 State
----------------------------------
  1 centos-server1       running
Start the Virtual Machine
virsh # start centos-server1
Domain centos-server1 started
Stop the Virtual Machine
virsh # destroy centos-server1
Domain centos-server1 destroyed