Wiki
Laravel is a free, open source PHP web application framework, designed for the development of MVC web applications. Laravel is released under the MIT license, with its source code hosted on GitHub. It’s beautifully written, full of features and the community is presently exploding. In this post, we will use it to create a socket based, real time chat application.
BrainSocket
BrainSocket is a Laravel package that allows you to get up and running with real-time event-driven PHP apps using WebSockets.
BrainSocket provides an Artisan command to setup and run a WebSocket server with Ratchet inside of a Laravel app.
Official Website brainsocket.brainboxmedia.ca
ReactPHP
Before we can understand Ratchet, we need to understand ReactPHP. ReactPHP was born out of the need to develop event-based, asynchronous PHP applications. If you’ve worked with Node.JS you’ll feel right at home developing applications with ReactPHP; as they share a similar approaches to code. We’re not going to develop our chat application in ReactPHP, but it’s a dependency for Ratchet ...
We can learn more about ReactPHP at: reactphp.org.
Ratchet
One of the many ways in which real-time client-server applications are made possible is by what’s called socket programming. Believe it or not; most of what you do on the internet depends on socket programming. From simple browsing to streaming — your computer opens a socket connection to a server and the server sends data back through it.
PHP supports this type of programming but PHP websites have not typically been developed with this kind of model in mind. PHP developers have preferred the typical request/response model, and it’s comparatively easier than low-level socket programming.
Enter ReactPHP. One of the requirements for building a fully-capable socket programming framework is creating what’s called an Event Loop. ReactPHP has this and Ratchet uses it, along with the Publish/Subscribe model to accept and maintain open socket connections.
ReactPHP wraps the low-level PHP functions into a nice socket programming API and Ratchet wraps that API into another API that's even easier to use.
We can learn more about Ratchet at: socketo.me.
Install Laravel through Composer. Edit your Laravel project's composer.json file and add the require brainboxlabs/brain-socket:
"require": {
    ...
    "cboden/ratchet"             : "0.3.*",
    "brainboxlabs/brain-socket"  : "dev-master"
},
Once the package and all of its dependencies have been installed we need to add the BrainSocketServiceProvider to our app/config/app.php file.
Add this line:
'providers' => array(
    ...
    'BrainSocket\BrainSocketServiceProvider',
to the end of the providers array in the config file.
There is also an optional but recommended Facade you should add to the aliases array in the app/config/app.php file.
'aliases' => array(
    ...
    'BrainSocket'     => 'BrainSocket\BrainSocketFacade',
Next open terminal and cd into your Laravel project directory.
run php artisan list and confirm you see the brainsocket: command in the list of commands. It should look like this:
Available commands:
brainsocket
    brainsocket:start
Once you have confirmed the list, run the following command to start the WebSocket server:
$ php artisan brainsocket:start
Note: The websocket server runs on port 8080 by default. You can change this with the optional --port=port_number on the end of the artisan command.
$ php artisan brainsocket:start --port=8081
At this point you should see a message in the terminal saying the websocket has been started on the selected port. Terminal will be locked down / unusable at this point, to stop the WebSocket server hit Ctrl C in the terminal.
Note: Any changes to your laravel app / code while the ws server is running are not taken into account. You need to restart the ws server to see any of your changes.
Lets stop the ws server now by hit Ctrl C in the terminal.
Next in your app/ folder create a file called events.php
Lets add the following code to events.php:
<?php

Event::listen('generic.event',function($client_data) {
    return BrainSocket::message('generic.event',array('message'=>'A message from a generic event fired in Laravel!'));
});

Event::listen('app.success',function($client_data) {
    return BrainSocket::success(array('There was a Laravel App Success Event!'));
});

Event::listen('app.error',function($client_data) {
    return BrainSocket::error(array('There was a Laravel App Error!'));
});
Now in app/start/global.php add the following line at the end of the file:
require app_path().'/filters.php';
require app_path().'/events.php';
Great! Now we have a few events to test out on the client side. Run the
$ artisan command php artisan brainsocket:start
to start the ws server again.
To make things easier we have created a simple js helper that allows us to interact with our new ws server a bit easier. It's not required but it handles some minor formatting tasks in the background so you don't have to and pairs nicely with our BrainSocket Facade.
Head over to github.com/BrainBoxLabs/brain-socket-js to grab it.
Load the script into your app:
<script type="text/javascript" src="js/brain-socket.min.js" />
Create the BrainSocket object:

window.app = {};

app.BrainSocket = new BrainSocket(
        new WebSocket('ws://localhost:8080'),
        new BrainSocketPubSub()
);
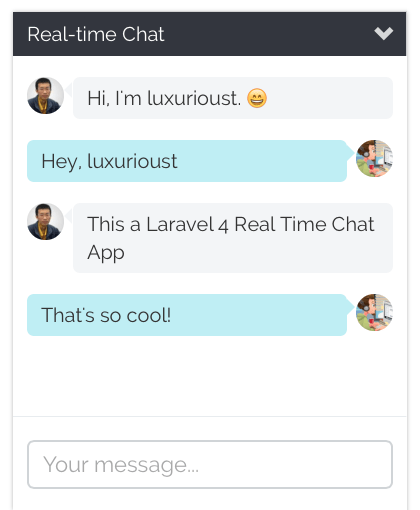
You can check out simple chat app in the example/ directory.
View
<div class="messenger bg-white">
    <div class="chat-header text-white bg-gray-dark">
        Real-time Chat
        <a href="#" id="chat-toggle" class="pull-right chat-toggle">
            <span class="glyphicon glyphicon-chevron-down"></span>
        </a>
    </div>
    <div class="messenger-body open">
        <ul class="chat-messages" id="chat-log">

        </ul>
        <div class="chat-footer">
            <div class="p-lr-10">
                <input type="text" id="chat-message"
                    class="input-light input-large brad chat-search" placeholder="Your message...">
            </div>
        </div>
    </div>
</div>

<script>
    $(function(){

        // var fake_user_id = Math.floor((Math.random()*1000)+1);
        var fake_user_id = {{ Auth::user()->id }};
        //make sure to update the port number if your ws server is running on a different one.
        window.app = {};

        app.BrainSocket = new BrainSocket(
                new WebSocket('ws://192.168.1.104:8080'),
                new BrainSocketPubSub()
        );

        app.BrainSocket.Event.listen('generic.event',function(msg){
            console.log(msg);
            if(msg.client.data.user_id == fake_user_id){
                $('#chat-log').append('<li><img src="{{ Auth::user()->portrait_small }}" class="img-circle" width="26"><div class="message">'+msg.client.data.message+'</div></li>');
            }else{
                var str_test='<li class="right"><img src="'+msg.client.data.user_portrait+'" class="img-circle" width="26"><div class="message">'+msg.client.data.message+'</div></li>';
                $('#chat-log').append(str_test);
            }
        });

        app.BrainSocket.Event.listen('app.success',function(data){
            console.log('An app success message was sent from the ws server!');
            console.log(data);
        });

        app.BrainSocket.Event.listen('app.error',function(data){
            console.log('An app error message was sent from the ws server!');
            console.log(data);
        });

        $('#chat-message').keypress(function(event) {

            if(event.keyCode == 13){

                app.BrainSocket.message('generic.event',
                        {
                            'message':$(this).val(),
                            'user_id':fake_user_id,
                            'user_portrait':'{{ Auth::user()->portrait_small}}'
                        }
                );
                $(this).val('');

            }

            return event.keyCode != 13; }
        );
    });
</script>
can i get the source code?
Hi, you can get source code at here https://github.com/Luxurioust/timefragment/blob/master/app/views/layout/account-chat.blade.php
thank you bro :)
It works with https connecttions? Because Brainsocket not supports SSL
Hi, do you know how to create connection by user ?
Have other way to push message to specific user. And other user cannot see that? The above code is filtered in JavaScript client side. Mean that if client not filtered so they can see all the message.
Cool! I got it to work but can anyone show me how to customize it? I'm looking for a way to let two logged in users chat with each other, but no one else will see their messages other then the both of them.
After i edit my composer.json and run the comand to update this warnings apears.
Package guzzle/common is abandoned, you should avoid using it. Use guzzle/guzzle instead.
Package guzzle/stream is abandoned, you should avoid using it. Use guzzle/guzzle instead.
Package guzzle/parser is abandoned, you should avoid using it. Use guzzle/guzzle instead.
Package guzzle/http is abandoned, you should avoid using it. Use guzzle/guzzle instead.
Is there anything i can do to update?
How create connection by user , and how many connections its possible to use? there is a kind of connection the we have in host? tnks
For that you should add an external ID 'to_user_id' in message and send it and then check on client side if the fake_user_id is equal to 'to_user_id' then display the message.
Doing so your message can be sent to a particular user but it is not secured as validation is carried out on client side.
Doing so your message can be sent to a particular user but it is not secured as validation is carried out on client side.
Load the script into your app(what file of app, it must be pointed please)
Hmmm.
Super cool! It's all working fine here. Thank you for sharing.
downloaded and got it working for homepage but not sure how to use it or even the chat function because its in Chinese language. is there any tutorial on this in English? Thanks.