![]()

Wiki
Elasticsearch is a search server based on Lucene. It provides a distributed, multitenant-capable full-text search engine with a RESTful web interface and schema-free JSON documents. Elasticsearch is developed in Java and is released as open source under the terms of the Apache License. Elasticsearch is the second most popular enterprise search engine. It can be used to search all kinds of documents. It provides scalable search, has near real-time search, and supports multitenancy. In this post I will talk about how to install and configure elasticsearch cluster on Ubuntu 14.04 LTS 64 bits.
Official Website elastic.co
Details Of Elasticsearch Cluster Architecture
Operating System            : Ubuntu 14.04 LTS Trusty Tahr 64-bit Server Edition
Package Name and version    : elasticsearch-1.7.0
No. of Servers              : 2
elasticnode01               : 192.168.171.129 (Name of server)
elasticnode02               : 192.168.171.130 (Name of server)
Ports opened in both servers
| Port Number | Source | Destination |
|---|---|---|
| 9100 | elasticnode01 | elasticnode02 |
| 9200 | elasticnode01 | elasticnode02 |
| 9300 | elasticnode01 | elasticnode02 |
| 9100 | elasticnode02 | elasticnode01 |
| 9200 | elasticnode02 | elasticnode01 |
| 9300 | elasticnode02 | elasticnode01 |
Dependencies
First, update the list of available packages by running apt-get update.
Next, we must install the Java runtime. There are two options here.
- Install the OpenJDK runtime supplied by Ubuntu.
- Install the Elasticsearch recommended Java runtime, Oracle Java.
The first option works perfectly fine if you would just like to play around and get acquainted with Elasticsearch or run a small collection of nodes. The latter option is the one recommended by Elasticsearch for guaranteed compatibility.
OpenJDK
To accomplish the first option, we can simply run apt-get install openjdk-7-jre.
Test Java installation
This step are implementing on elasticnode01 & elasticnode02.
We can then check that Java is installed by running java -version.
$ java -version
java version "1.7.0_79"
OpenJDK Runtime Environment (IcedTea 2.5.5) (7u79-2.5.5-0ubuntu0.14.04.2)
OpenJDK 64-Bit Server VM (build 24.79-b02, mixed mode)
That's all the dependencies we need for now, so let's get started with obtaining and installing Elasticsearch.
Download and Install
This step are implementing on elasticnode01 & elasticnode02.
Elasticsearch can be downloaded directly from their site in zip, tar.gz, deb, or rpm packages. You don't need to do this ahead of time, as we will download the files that we need as we need them in the text below.
Download the Debian package archive via wget
$ wget https://download.elastic.co/elasticsearch/elasticsearch/elasticsearch-1.7.0.deb
Installing directly from a Debian package is done by running
$ sudo dpkg -i elasticsearch-1.7.0.deb
This results in Elasticsearch being properly installed in /usr/share/elasticsearch. Recall that installing from the Debian package also installs an init script in /etc/init.d/elasticsearch that starts the Elasticsearch server running on boot. The server will also be immediately started after installation.
Configuration files
Edit config/elasticsearch.yml file and update the given below parameters.
$ sudo vim /etc/elasticsearch/elasticsearch.yml
In Server elasticnode01
cluster.name: mycluster
node.name: "elasticnode01"
discovery.zen.ping.multicast.enabled: false
discovery.zen.ping.unicast.hosts: ["elasticnode02"]
In Server elasticnode02
cluster.name: mycluster
node.name: "elasticnode02"
discovery.zen.ping.multicast.enabled: false
discovery.zen.ping.unicast.hosts: ["elasticnode01"]
In both server elasticnode01 and elasticnode02 , edit the /etc/hosts file and map the both servers ip address . Replace the below given ip addresses with your server’s ip addresses.
192.168.171.129 elasticnode01
192.168.171.130 elasticnode02
Start the elasticsearch server. Use the command in both server – elasticnode01 and elasticnode02.
$ sudo service elasticsearch start
Test Elasticsearch install
Ensure the server is started by running
$ curl -X GET 'http://localhost:9200'
Should see the following response
{
    "status"        : 200,
    "name"          : "elasticnode02",
    "cluster_name"  : "mycluster",
    "version" : {
        "number"            : "1.7.0",
        "build_hash"        : "929b9739cae115e73c346cb5f9a6f24ba735a743",
        "build_timestamp"   : "2015-07-16T14:31:07Z",
        "build_snapshot"    : false,
        "lucene_version"    : "4.10.4"
    },
    "tagline"       : "You Know, for Search"
}
If we see a response similar to the one above, Elasticsearch is working properly. Alternatively, we can query our install of Elasticsearch from a browser by visiting :9200. We should see the same JSON as we saw when using curl above.
Basic usage
Create index
$ curl -XPUT 'localhost:9200/customer?pretty'
Put information into our customer index:
curl -XPUT 'localhost:9200/customer/external/1?pretty' -d '
{
    "name": "Ri Xu"
}'
Let's give this a try
$ curl -X GET localhost:9200/customer/external/1?pretty
{
    "_index"    : "customer",
    "_type"     : "external",
    "_id"       : "1",
    "_version"  : 1,
    "found"     : true,
    "_source": {
        "name"  : "Ri Xu"
    }
}
Get record by search
POST /twitter/tweet/_search

{
    "size": 10,
    "query":
    {
        "range":
        {
            "create_time":
            {
                "gte": 1524844800,
                "lte": 1524931200
            }
        }
    }
}
Delete record by query
DELETE /twitter/tweet/_query

{
    "query":
    {
        "term":
        {
            "user": "kimchy"
        }
    }
}
Checking cluster through command line. You can run from any node server (elasticnode01 / elasticnode02).
Checking cluster health
$ curl 'localhost:9200/_cat/health?v'
epoch timestamp cluster status node.total node.data shards pri relo init unassign pending_tasks
1437735048 18:50:48 mycluster green 2 2 0 0 0 0 0 0
Checking node status in cluster
$ curl 'localhost:9200/_cat/nodes?v'
host ip heap.percent ram.percent load node.role master name
ubuntu 127.0.1.1 3 37 0.00 d * elasticnode02
ubuntu 127.0.1.1 6 31 0.01 d m elasticnode01
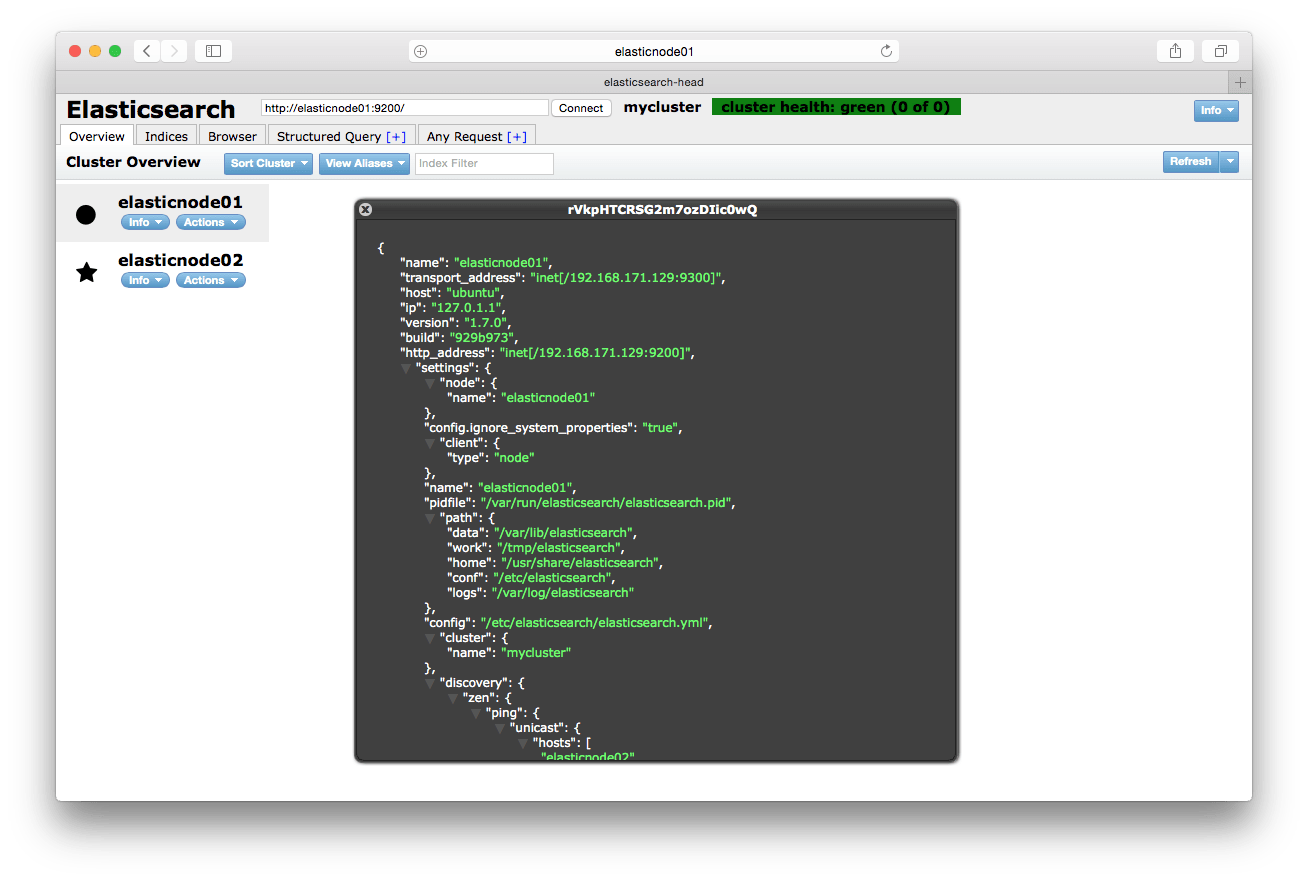
Installing useful plugin for GUI. Install the plugin in both server that is elasticnode01 and elasticnode02.
elasticsearch-head - A web front end for an Elasticsearch cluster
$ sudo /usr/share/elasticsearch/bin/plugin -install mobz/elasticsearch-head
elasticsearch-head web interface in web browser via visit http://ip-address-node:9200/_plugin/head

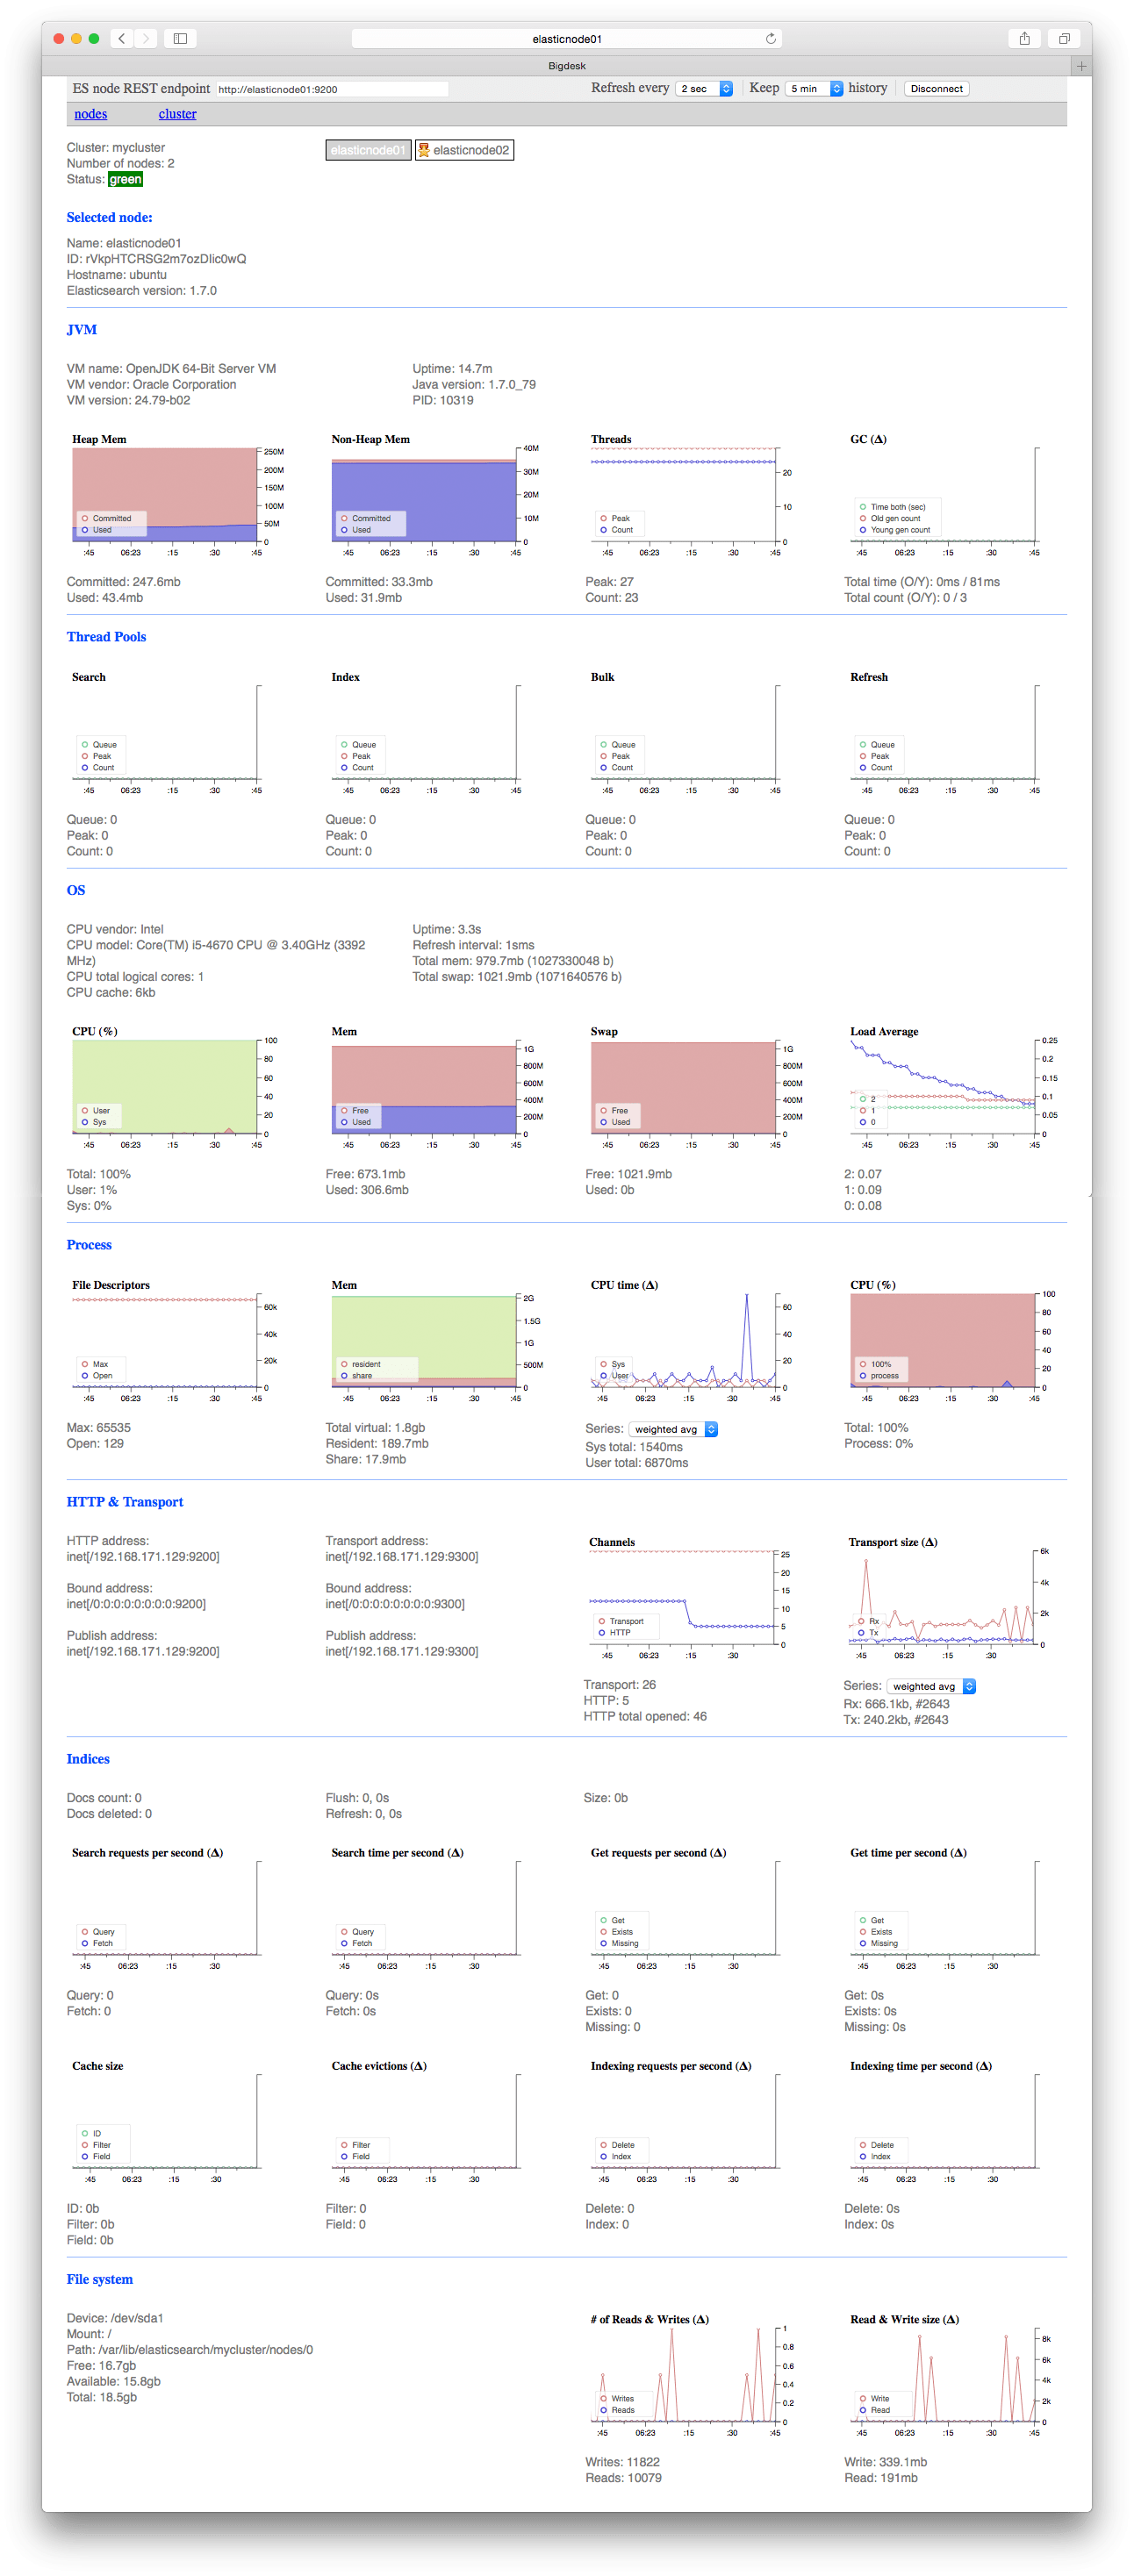
Bigdesk - Installing bigdesk plugin in both servers.
$ sudo /usr/share/elasticsearch/bin/plugin -install lukas-vlcek/bigdesk
Open bigdesk in web browser : http://ip-address-node:9200/_plugin/bigdesk

Conclusion
I have now installed, configured and begun using Elasticsearch. Since it responds to a basic RESTful API. It is now easy to begin adding to and querying data using Elasticsearch from your application.