
Xen is a native (bare-metal) hypervisor providing services that allow multiple computer operating systems to execute on the same computer hardware concurrently.
The University of Cambridge Computer Laboratory developed the first versions of Xen. The Xen community develops and maintains Xen as free and open-source software, subject to the requirements of the GNU General Public License (GPL), version 2. Xen is currently available for the IA-32, x86-64 and ARM instruction sets.
Official Website www.xenproject.org
Nested Virtual Testing Environment
Host Operating System                         : Ubuntu Desktop 12.04 LTS 64-bit
VMware Virtual Machine Guest Operating System : Ubuntu Desktop 12.04 LTS 64-bit
Xen Guest Operating System                    : Microsoft Windows Server 2003 Professional R2 32-bit
1. In VMware Virtual Machine environment, install Ubuntu Server 12.04, the installation process is very simple, I will not detail here, and I chose the virtual network NAT mode. In the Virtual Machine Settings dialog box, enable the Virtualization engine options( Virtualize Intel VT-x/EPT or AMD-v/RVI and Virtualize CPU performance counters).
2. Configuring APT Source (Optional)
# Ubuntu 12.04 Source Powered by Sohu
deb http://mirrors.sohu.com/ubuntu/ precise main restricted universe multiverse
deb http://mirrors.sohu.com/ubuntu/ precise-security main restricted universe multiverse
deb http://mirrors.sohu.com/ubuntu/ precise-updates main restricted universe multiverse
deb http://mirrors.sohu.com/ubuntu/ precise-proposed main restricted universe multiverse
deb http://mirrors.sohu.com/ubuntu/ precise-backports main restricted universe multiverse
deb-src http://mirrors.sohu.com/ubuntu/ precise main restricted universe multiverse
deb-src http://mirrors.sohu.com/ubuntu/ precise-security main restricted universe multiverse
deb-src http://mirrors.sohu.com/ubuntu/ precise-updates main restricted universe multiverse
deb-src http://mirrors.sohu.com/ubuntu/ precise-proposed main restricted universe multiverse
deb-src http://mirrors.sohu.com/ubuntu/ precise-backports main restricted universe multiverse

$ sudo apt-get update
3. Install Xen Package
$ sudo apt-cache search xen
$ sudo apt-get install xen-hypervisor-4.1-amd64 xen-utils-4.1 xen-tools xen-docs-4.1
4. Install libvirt and Virtual Manager Tools
$ sudo apt-cache search virt-install
$ sudo apt-get install virtinst python-libvirt virt-viewer virt-manager
5. Create Xen Virtual Machine Images
$ sudo dd if=/dev/zero of=/etc/xen/vm01.img bs=1M count=3072
3072+0 records in
3072+0 records out
3221225472 bytes (3.2 GB) copied, 39.5561 s, 81.4 MB/s
6. View Dom0 Current Status
$ sudo xm list
Name                                        ID   Mem VCPUs      State   Time(s)
Domain-0                                     0   945     2     r-----     73.1
$ sudo xm info
host                   : ubuntu
release                : 3.5.0-23-generic
version                : #35~precise1-Ubuntu SMP Fri Jan 25 17:13:26 UTC 2013
machine                : x86_64
nr_cpus                : 2
nr_nodes               : 1
cores_per_socket       : 2
threads_per_core       : 1
cpu_mhz                : 2493
hw_caps                : 1fabfbff:28100800:00000000:00007f40:f2ba2223:00000000:00000001:00000281
virt_caps              : hvm
total_memory           : 1023
free_memory            : 63
free_cpus              : 0
xen_major              : 4
xen_minor              : 1
xen_extra              : .2
xen_caps               : xen-3.0-x86_64 xen-3.0-x86_32p hvm-3.0-x86_32 hvm-3.0-x86_32p hvm-3.0-x86_64
xen_scheduler          : credit
xen_pagesize           : 4096
platform_params        : virt_start=0xffff800000000000
xen_changeset          : unavailable
xen_commandline        : placeholder
cc_compiler            : gcc version 4.6.3 (Ubuntu/Linaro 4.6.3-1ubuntu5)
cc_compile_by          : stefan.bader
cc_compile_domain      : canonical.com
cc_compile_date        : Tue Jun 25 13:22:36 UTC 2013
xend_config_format     : 4
If you execute the xm list command, get a Can't find hypervisor information in sysfs error, running the following command, reboot, choose the xen kernel boot into the system, and then check whether it has been successfully installed Xen
$ sudo mv /etc/grub.d/10_linux /etc/grub.d/50_linux
$ sudo update-grub2
$ sudo reboot
7. Modify the Configuration File
$ sudo vi /etc/xen/xend-config.sxp
Modify #(xend-unix-server no) to (xend-unix-server yes), save the file and then restart the xend service
$ sudo xend restart
8. View xen version information via libvirt, confirm libvirt and xen have been successfully installed
$ virsh version
Compiled against library: libvir 0.9.8
Using library: libvir 0.9.8
Using API: Xen 0.9.8
Running hypervisor: Xen 4.1.0
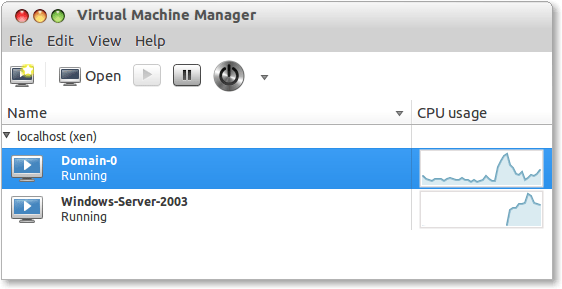
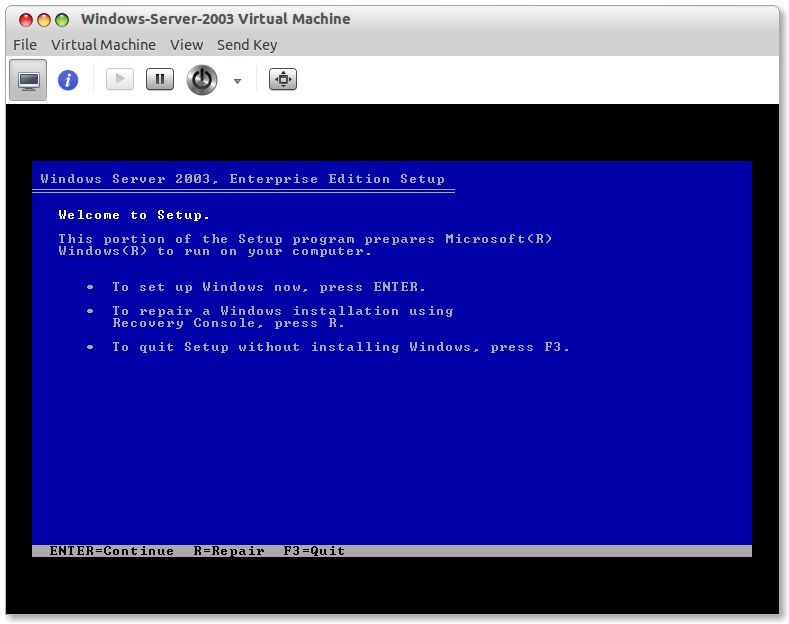
9. Using Xen Install Windows Server 2003 R2 Virtual Machine
Copy ISO installation files to /usr or /opt directory, in a terminal type ...
$ sudo virt-manage
... then you follow the wizard to install the guest operating system
If you get a Unable to complete install: 'POST operation failed: xend_post: error from xen daemon: ..., try running the following command
$ sudo ln -s /usr/share/qemu-linaro /usr/share/qemu
So far install Xen on ubuntu desktop 12.04 LTS and using virtual manage create a virtual machine has beed completed.
I got stuck in step 8 $ sudo virsh version I am getting following err
setlocale: No such file or directory
error: Failed to connect socket to '/var/run/libvirt/libvirt-sock': No such file or directory
error: failed to connect to the hypervisor
any idea how it could be solved?
i am getting error in xend restart it shows that "xend command not found"
how could i solve this problem